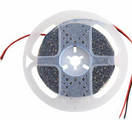
How to Install COB LED Strip Lights?
Installing COB LED strip lights is a straightforward process that can dramatically enhance the lighting in any space. These lights offer a continuous, uniform light output that is ideal for creating smooth, ambient lighting. Follow these steps to ensure your COB LED strip lights are installed properly and safely.
Choose the Correct COB LED Strip
Selecting the right COB LED strip light is crucial. You’ll need to consider the voltage (typically 12V or 24V), color temperature, and luminous efficacy. COB strips generally come in a range of color temperatures from warm white (around 3000K) to cool white (6500K), allowing you to choose the hue that best suits your space.
Gather Your Materials
Before you start, make sure you have all the necessary tools and materials:
- COB LED strip lights
- A compatible power supply
- Connectors (if you need to cut and connect multiple strips)
- Mounting clips or adhesive tape
- Wire cutters and strippers
- Soldering iron (if you choose to solder connections)
Measure and Cut
Measure the area where you want to install your strip lights and cut your COB LED strip to length. Unlike traditional LED strips that have specific cut points, some COB strips can be cut at any point along their length, providing great flexibility in installation.
Ensure a Clean Surface
The adhesive backing on COB LED strips requires a clean, smooth surface to adhere properly. Clean the surface area with alcohol wipes or a suitable cleaning agent to remove any dust, oil, or debris.

Mounting Your Strip
Peel off the adhesive backing and stick the strip firmly in place. For added security and to ensure optimal heat dissipation, you can also use mounting clips or channels. This is especially useful in areas where the strip might be subjected to physical stress or where additional heat management is needed.
Connect to Power
Connect your strip to the power supply. Ensure that your power supply matches the voltage requirements of your LED strip. If you are connecting multiple strips, make sure the total wattage of the strips does not exceed the output capacity of the power supply.
Wiring Connections
If your project involves connecting multiple strips, you can use solderless connectors for a quick and easy installation. However, for a more reliable connection, soldering the wires directly to the strip is recommended. Ensure all connections are tight and secure to avoid any potential electrical issues.
Test Your Installation
Before finalizing your installation, turn on the power to test each section of the strip. Check for any uneven brightness or non-functioning segments, which may indicate a poor connection.
Final Adjustments
Once you are satisfied with the setup, make any necessary adjustments to the positioning of the strips or wiring. You can now enjoy the sleek, even lighting that COB LED strip lights provide.
Installing COB LED strip lights is not only simple but also an effective way to enhance the aesthetic appeal and functionality of your lighting environment. With their superior brightness and color consistency, these lights are an excellent choice for both residential and commercial spaces.


